

Last Updated: October 25, 2026
Quick Summary
Water heater maintenance starts with flushing the tank once a year to remove sediment, testing the T&P valve, and checking the anode rod every two to three years. Set the thermostat to 120°F, inspect for leaks and rust every six months, and leave gas, electrical, and tankless descaling work to a licensed technician.
- Flush a tank water heater yearly, or every 6 months with very hard water.
- Replace the anode rod once more than half of it is consumed.
- Test the T&P valve yearly by lifting the lever and listening for discharge.
- Set the thermostat to 120°F to reduce scalding risk and heat loss.
- Never open the drain valve on a powered electric heater.
Table of Contents
- Your Water Heater Maintenance Checklist at a Glance
- How Often to Flush a Water Heater (and What Changes the Schedule)
- How to Flush a Water Heater: A Safety-First Walkthrough
- Water Heater Anode Rod Replacement: The Cheapest Way to Add Years
- Test the T&P Valve, Check for Leaks, and Set the Right Temperature
- Troubleshooting Symptoms and What They Usually Mean
- Book a Preventative Maintenance Visit with Clayton McKay
- Frequently Asked Questions
Your Water Heater Maintenance Checklist at a Glance
Learning how to maintain home water heater equipment starts with one truth: most tanks fail from neglect, not age. A simple annual routine prevents that.
Here’s the full checklist we recommend:
| Task | How Often | DIY or Pro |
|---|---|---|
| Flush the tank | Yearly | DIY |
| Test the T&P valve | Yearly | DIY |
| Check the anode rod | Every 2-3 years | DIY |
| Inspect for leaks and rust | Every 6 months | DIY |
| Set the thermostat | Once, then yearly | DIY |
| Check water pressure | Yearly | DIY |
| Tankless descaling | Yearly | Pro |
| Gas and electrical checks | Yearly | Pro |
Tasks You Can Do Yourself vs. Work for a Licensed Technician
Flushing, valve tests, and visual checks are safe for most homeowners. Anything involving the gas line, the burner, the electrical supply, or a tankless unit’s internal parts belongs to a licensed technician. Manufacturer instructions and your warranty terms usually require it.
How Often to Flush a Water Heater (and What Changes the Schedule)
Flush a tank water heater once a year. That’s the baseline. Hard water changes the math, because mineral buildup collects faster and insulates the heating element from the water.
Use this schedule:
- Soft water: every 12 months
- Moderately hard water: every 8-10 months
- Very hard water: every 6 months
Sediment settles at the bottom of the storage tank. It causes popping sounds, slower hot water supply, and higher energy bills. Skipping flushes shortens service life in a way no repair fixes.
How to Flush a Water Heater: A Safety-First Walkthrough
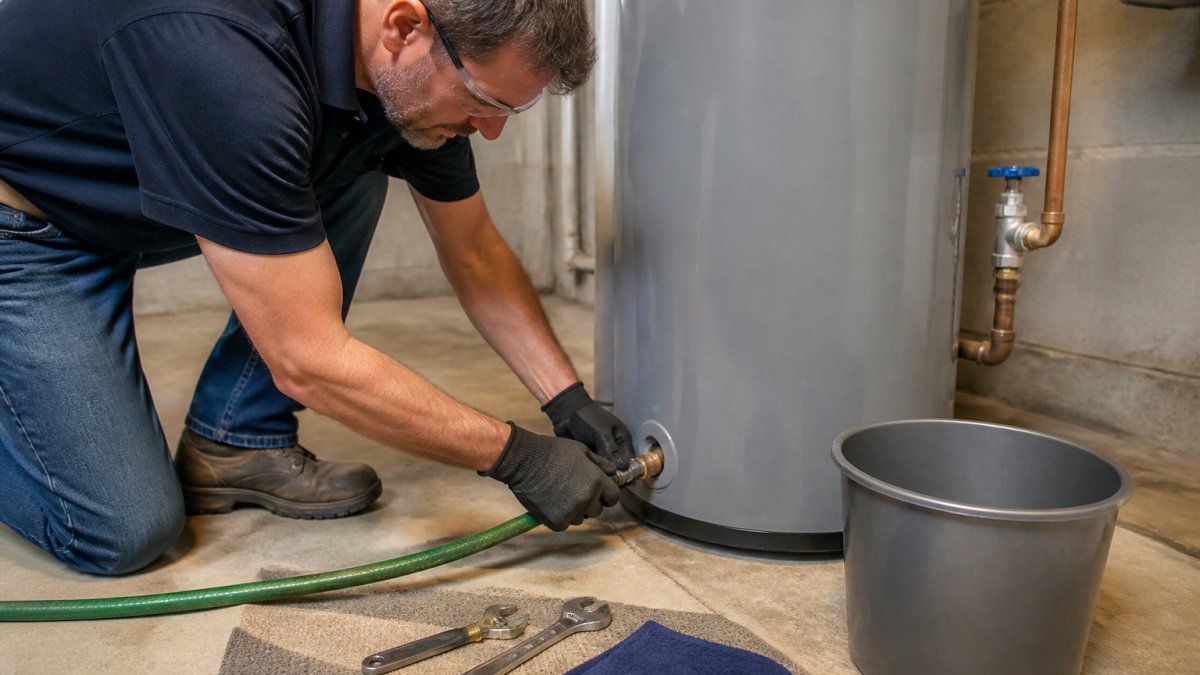
Flushing is the single most valuable maintenance task you can do, and it is also the one most likely to go wrong if you rush the shutdown sequence. The order matters: kill the heat source, kill the water supply, then drain.
Before You Touch Anything
- Read the unit’s manual first. Manufacturer instructions vary on drain-valve type, whether a dip tube or plastic fitting needs support, and whether the unit must be fully cooled before draining. Following the manual also protects your warranty.
- Let the tank cool. Give a gas or electric tank several hours after the last heating cycle. Water at 120°F and above can scald in seconds.
- Gather the right tools: a garden hose long enough to reach a floor drain or outside, work gloves, a bucket, a flat-head screwdriver, and a towel. A wet/dry shop vac helps if the drain valve drips.
Shut Down Safely
- Turn off the power or fuel. For electric units, flip the dedicated breaker at the panel, not just the thermostat. For gas, set the control to the pilot position or off per the label. For a power-vented or direct-vent gas unit, the manual may call for shutting the gas valve too.
- Shut the cold-water inlet valve on top of the tank. If it will not close fully, stop here.
- Open a hot-water faucet at the highest fixture in the house. This breaks the vacuum and lets the tank drain.
Drain and Rinse
- Connect the hose to the drain valve at the base and run the other end to a floor drain, outside, or a bucket. Secure the hose so it does not whip when the valve opens.
- Open the drain valve and let the tank empty. Expect 40 to 80 gallons for a typical residential tank, so plan the drain path before you start.
- Rinse the sediment. Once the flow slows, briefly open the cold-water inlet to stir loosened sediment, then close it again. Repeat until the water runs clear. This is the step that actually removes the mineral crust, not just the standing water.
- Close the drain valve and remove the hose. Check that the valve seats fully; a drip here becomes a puddle later.
Refill and Restore
- Refill the tank completely with the cold-water inlet open and a hot faucet open upstairs to let air escape. Do not restore power or light the burner until water runs steadily from the hot tap, a dry element will fail almost immediately.
- Restore power or fuel and confirm the unit heats. Check around the drain valve and fittings for weeping after the first heating cycle.
Never open the drain valve on a powered electric heater. The upper element can fire dry and burn out within seconds. If you are unsure whether the breaker is the right one, trip the main and verify with a non-contact voltage tester before draining.
If your drain valve is the original plastic type, many plumbers replace it with a brass ball valve during the first flush. It costs little, drains faster, and is far less likely to snap.
Flushing a Tankless Water Heater
Tankless units don’t hold water, so there’s no tank to drain. Instead, they need descaling. A technician pumps a vinegar solution through the heat exchanger to dissolve calcium buildup. Most manufacturers recommend this once a year, and it’s not a job for a garden hose. The service valves on the unit make the process quick for a pro, and skipping it is a common cause of reduced hot-water output and error codes.
Water Heater Anode Rod Replacement: The Cheapest Way to Add Years
The anode rod is a sacrificial metal rod inside the tank. It corrodes so the steel tank doesn’t. Once it’s used up, rust starts eating the tank itself, and a tank that rusts through cannot be repaired, only replaced.
What the Rod Actually Does
The rod is made of a metal more reactive than steel, typically magnesium, aluminum, or a zinc-aluminum alloy, so it gives up electrons first. That is why it disappears while the tank lining survives. The trade-off is that different rod types suit different water conditions:
- Magnesium rods protect well in soft water but can react with sulfate in some supplies to produce a rotten-egg smell.
- Aluminum rods are common in hard water and are less prone to odor but may not protect as long in very soft water.
- Powered (impressed-current) anode rods use a small power supply to protect the tank and last far longer, but they cost more and require an outlet near the heater.
Match the replacement rod to the original type unless a licensed plumber recommends otherwise. Using the wrong rod can void coverage or create odor complaints.
How to Inspect the Rod
- Shut off power or fuel and the cold-water inlet, and relieve pressure by opening a hot faucet.
- Locate the rod. On most tanks it is a hex-head fitting on top, sometimes under the hot-water outlet or a plastic cap. On some models it is on the side or combined with the hot outlet.
- Check clearance before you start. A rod needs roughly 4 to 5 feet of vertical space to pull out. If the heater sits under a low ceiling or in a tight closet, a segmented rod is the practical choice.
- Unscrew the fitting with a socket or wrench. If it will not budge, do not force it, a cracked tank fitting is a replacement-level problem.
- Pull the rod and inspect. If more than half the rod is consumed, or the core wire is exposed along most of its length, replace it. If the rod is coated in white scale, that is mineral buildup, not necessarily failure, clean it and recheck.
- Install the new rod with thread sealant, torque it snug per the manual, refill the tank fully, and restore power.
Check the rod every two to three years. In hard water, shorten that to every two years, because mineral scale can mask how much metal is left.
Replacing an anode rod is one of the few maintenance tasks that reliably extends tank life, and it is inexpensive relative to a new heater. Weigh it against how long a hot water heater usually lasts before deciding whether to replace the rod or plan for replacement.
Warranty and Age Considerations
Most tank warranties run five to ten years and are conditioned on following the manufacturer’s maintenance schedule, including anode-rod inspection. Keep receipts and note the date of each rod change. If the tank is already past its warranty window and the rod is gone, the money is often better put toward a new unit than toward a rod that is protecting a tank already near the end of its life.
A common mistake is ignoring the rod until water runs rusty. By then, the tank is already failing.
Test the T&P Valve, Check for Leaks, and Set the Right Temperature
The temperature-and-pressure relief valve is the safety device that keeps a tank from over-pressurizing. Test it yearly: lift the lever, listen for water to discharge, then let it reseat.
While you’re there, check for leaks and rust around the fittings. If you spot moisture, read up on what causes a water heater to leak so you know whether it’s a fitting or the tank.
Set the thermostat to 120°F. That’s hot enough for most homes and reduces scalding risk. Insulate the tank and the first few feet of pipe to cut heat loss.
Monitoring Household Water Pressure
High water pressure stresses every fitting in the system. A simple gauge on a hose bib tells you where you stand. If readings run high, a pressure-reducing valve protects the water heater and the rest of your plumbing.
Troubleshooting Symptoms and What They Usually Mean
Here’s what the warning signs tend to indicate:
- Popping or rumbling: sediment buildup. Flush the tank.
- Rusty hot water: a failing anode rod or a corroding tank.
- Water pooling at the base: a leak at the drain valve, T&P valve, or tank seam.
If several of these show up together, it may be time for replacement. Our guide on the signs a water heater is dying walks through what to check before you call anyone.
Book a Preventative Maintenance Visit with Clayton McKay
Some tasks reward a professional touch. If you’d rather hand the whole checklist to a licensed plumber, you can book water heater service with our team. Our Comfort Plus+ maintenance plan adds preferred scheduling and savings across your plumbing, HVAC, and electrical systems.
We’ve served homeowners across the region since 1973 as a family-owned business, with Massachusetts licensed plumbers and certified HVAC technicians on staff. Clear communication and accurate invoicing come standard.
Frequently Asked Questions
Do water heaters really need annual maintenance?
Most manufacturers recommend an annual inspection, and it pays off. Sediment builds up in the storage tank, forcing the burner or heating element to work harder and shortening service life. A yearly water heater maintenance routine, including a flush and a T&P valve test, catches corrosion and leaks before they turn into a flooded basement. Skipping it can also affect your manufacturer warranty, since many require documented upkeep.
How often should I flush my home water heater?
Once a year is the standard interval for most households. If you have hard water or high mineral buildup, flush every six to twelve months instead. Homes with a water softener can often stretch to the annual mark. Tankless units need a vinegar or descaler flush about once a year as well, since calcium buildup on the heat exchanger is the leading cause of early failure.
Can I flush my water heater myself, or should I hire a pro?
A basic drain and flush is a reasonable DIY job if you can shut off the power or gas, connect a garden hose, and open the drain valve safely. Call a licensed plumber when the drain valve is stuck or corroded, when you see rust-colored water, or when the anode rod needs replacement. Those jobs involve gas supply, electrical connections, and potential leaks that are better handled by a professional.
What is the most common problem with gas water heaters?
Sediment buildup and a worn anode rod top the list. Sediment causes rumbling noises and uneven heating, while a depleted anode rod lets the steel tank corrode from the inside. A failing thermocouple or pilot light is another frequent gas-specific issue. Annual flushing and checking the sacrificial anode during your water heater maintenance checklist prevents most of these failures.
Your water heater works hard and asks for little. A yearly flush, a valve test, and a quick look at the anode rod keep it running for years. When a task needs a licensed hand, get started with Clayton McKay and schedule a maintenance visit that protects your system and your warranty.


Leave A Comment